==== NOTE: All major browsers have distrusted StartCom for now. They are expecting StartCom to update their ciphers to SHA2 in order to regain their trust. For that reason following the tutorial below will result in NET::ERR_CERT_AUTHORITY_INVALID on Chrome. ====
Some days ago I wanted to make all my connections at home secured over SSL. I therefore created a free SSL certificate from Startcom in order to use it with all my websites. I wasn't aware that Serviio was capable of SSL but later, I found that we could indeed use ports 23524(mediabrowser) and 23523(console) for secure connections. That worked out of box but the problem was the warnings and red screens that were generated since Serviio is using its own self-signed certificate.
In the following tutorial I will show you how to use your own certificates with Serviio. I will specifically show all steps for use with a certificate issued by Startcom and a Synology NAS(DiskStation DS716+II) but it will be very similar with any other configuration.
Things needed before we start:
- The zip file with the certificates. Specifically, we need the OtherServer.zip that is included in the .zip file you downloaded from Startcom's website after you were done generating your certificates.
- The .key file that you created during the certificate creating process.
- You need to have Java Runtime Environment(JRE) installed on your computer in order to alter the keystore. Click here to download.
- A very neat tool I found called KeyStore Explorer that will help us edit the existing Serviio's keystore using a GUI instead of the command line. Click here to download.
- If you use Synology, Putty is needed to SSH to the NAS in order to execute some commands through terminal. Click here to download.
- A program to unzip and zip the .jar file. I use WinRar. Click here to download.
- I will enclose every command in quotes so be sure to remove them before you copy/paste them.
Time to get going.
Synology doesn’t allow the system files to be listed through shares or FTP so we need to do it manually through command line. You can use Telnet for this but I always use SSH because it’s far more secure. So start Putty and connect to your NAS’ IP address.
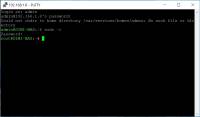
You will need to use the account “admin” in order to gain root access. The password is the same as your main account. After you login, type sudo –i and after you enter your password once more, you will end up with something like this:
The hashtag indicates root access.
Type “cd /” to get to the root folder and type “ls” to get your folders listed. Find the name of the partition of your hard drives on the NAS, mine is volume1. Then type the following command: “cd /volume1/@appstore/Serviio”. Then type “ls” and this is the list you will get:
We will need to copy to our computer 2 files. One located in the directory lib and another in the directory config. For this purpose create a shared folder on your NAS that you can easily open through “My Network Places” from your computer in order to grab the copied files. I have created the folder Downloads under my shared folder Files.
From the directory you are currently in, execute the following commands and replace /volume1/Files/Downloads with your directories:
“cp lib/serviio.jar /volume1/Files/Downloads”
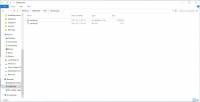
After that. You have the 2 files in that directory and you can access them from Windows:
Double-click serviio.jks KeyStore. This will open it with the Keystore Explorer. You will be asked to type a password. This is the password: >[Z=@Ahjr,(pA[{4,u8Q?T`gzKp^mAf&
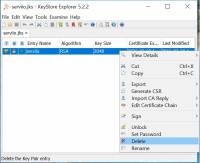
After that you will see the key entry for serviio. Right-click and choose Delete.
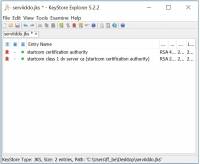
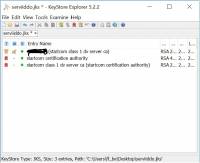
Then, right click in the white area and choose Import Trusted Certificate. Do this twice and choose the Intermediate and root certificate you got from Startcom. The result will look like this:
Last step is to create a key pair for your domain. Right-click in the white area again and this time choose Import Key Pair. Choose PKCS #8 and uncheck the Encrypted Private Key checkbox. Choose your .key file as the PKCS #8 Private Key File and your domains public key(your_domain.crt) as the Certificate(s) File. Then click import and OK. Choose a password and remember it because we will use it soon. The result will look like this:
Press File→Save and close KeyStore Explorer.
Unzip the .jar file in your NAS shared folder by right-clicking it and choosing extract to serviio\. In the folder created, there is a serviio.properties file. Open it with a text editor like notepad and change the entry ssl_keystore_key_password= to match the password you chose for your key pair in Keystore Explorer.
Save and close the file, choose all the files(ctrl+A) INSIDE the serviio folder (NOT the folder itself) and right-click→Add to archive… In the WinRar’s Archive format choose ZIP and change the Archive name to serviio.jar. Click OK.
Now the editing is done. Last step is to copy both these files back to their directories.
In Putty, we type the following command:
“cp /volume1/Files/Downloads/serviio.jks /volume1/@appstore/Serviio/config”
This will overwrite the existing ones. We won’t receive confirmation that that command worked so there is nothing to worry about.
Now we are all set. We just need to stop and start the Serviio Package from the NAS webpage:
This is it! Now both your console and media browser use a valid certificate. Please take any discussions in this thread.

